What is Land Use Mapping?
By GeoLayers.co.za Editorial •
Land use mapping is the process used to identify and classify different types of land uses in a given geographic area. There are many ways of creating land use maps, some may include analyzing aerial images taken by drones and satellites or conducting field surveys to determine the specific purpose that a piece of land is being used for. Once the data has been collected, it needs to be organized and presented visually for decision makers. GIS software allows for the different types of data sets collected in the field or by other means to be integrated into a single system and create a map of the different types of land uses.
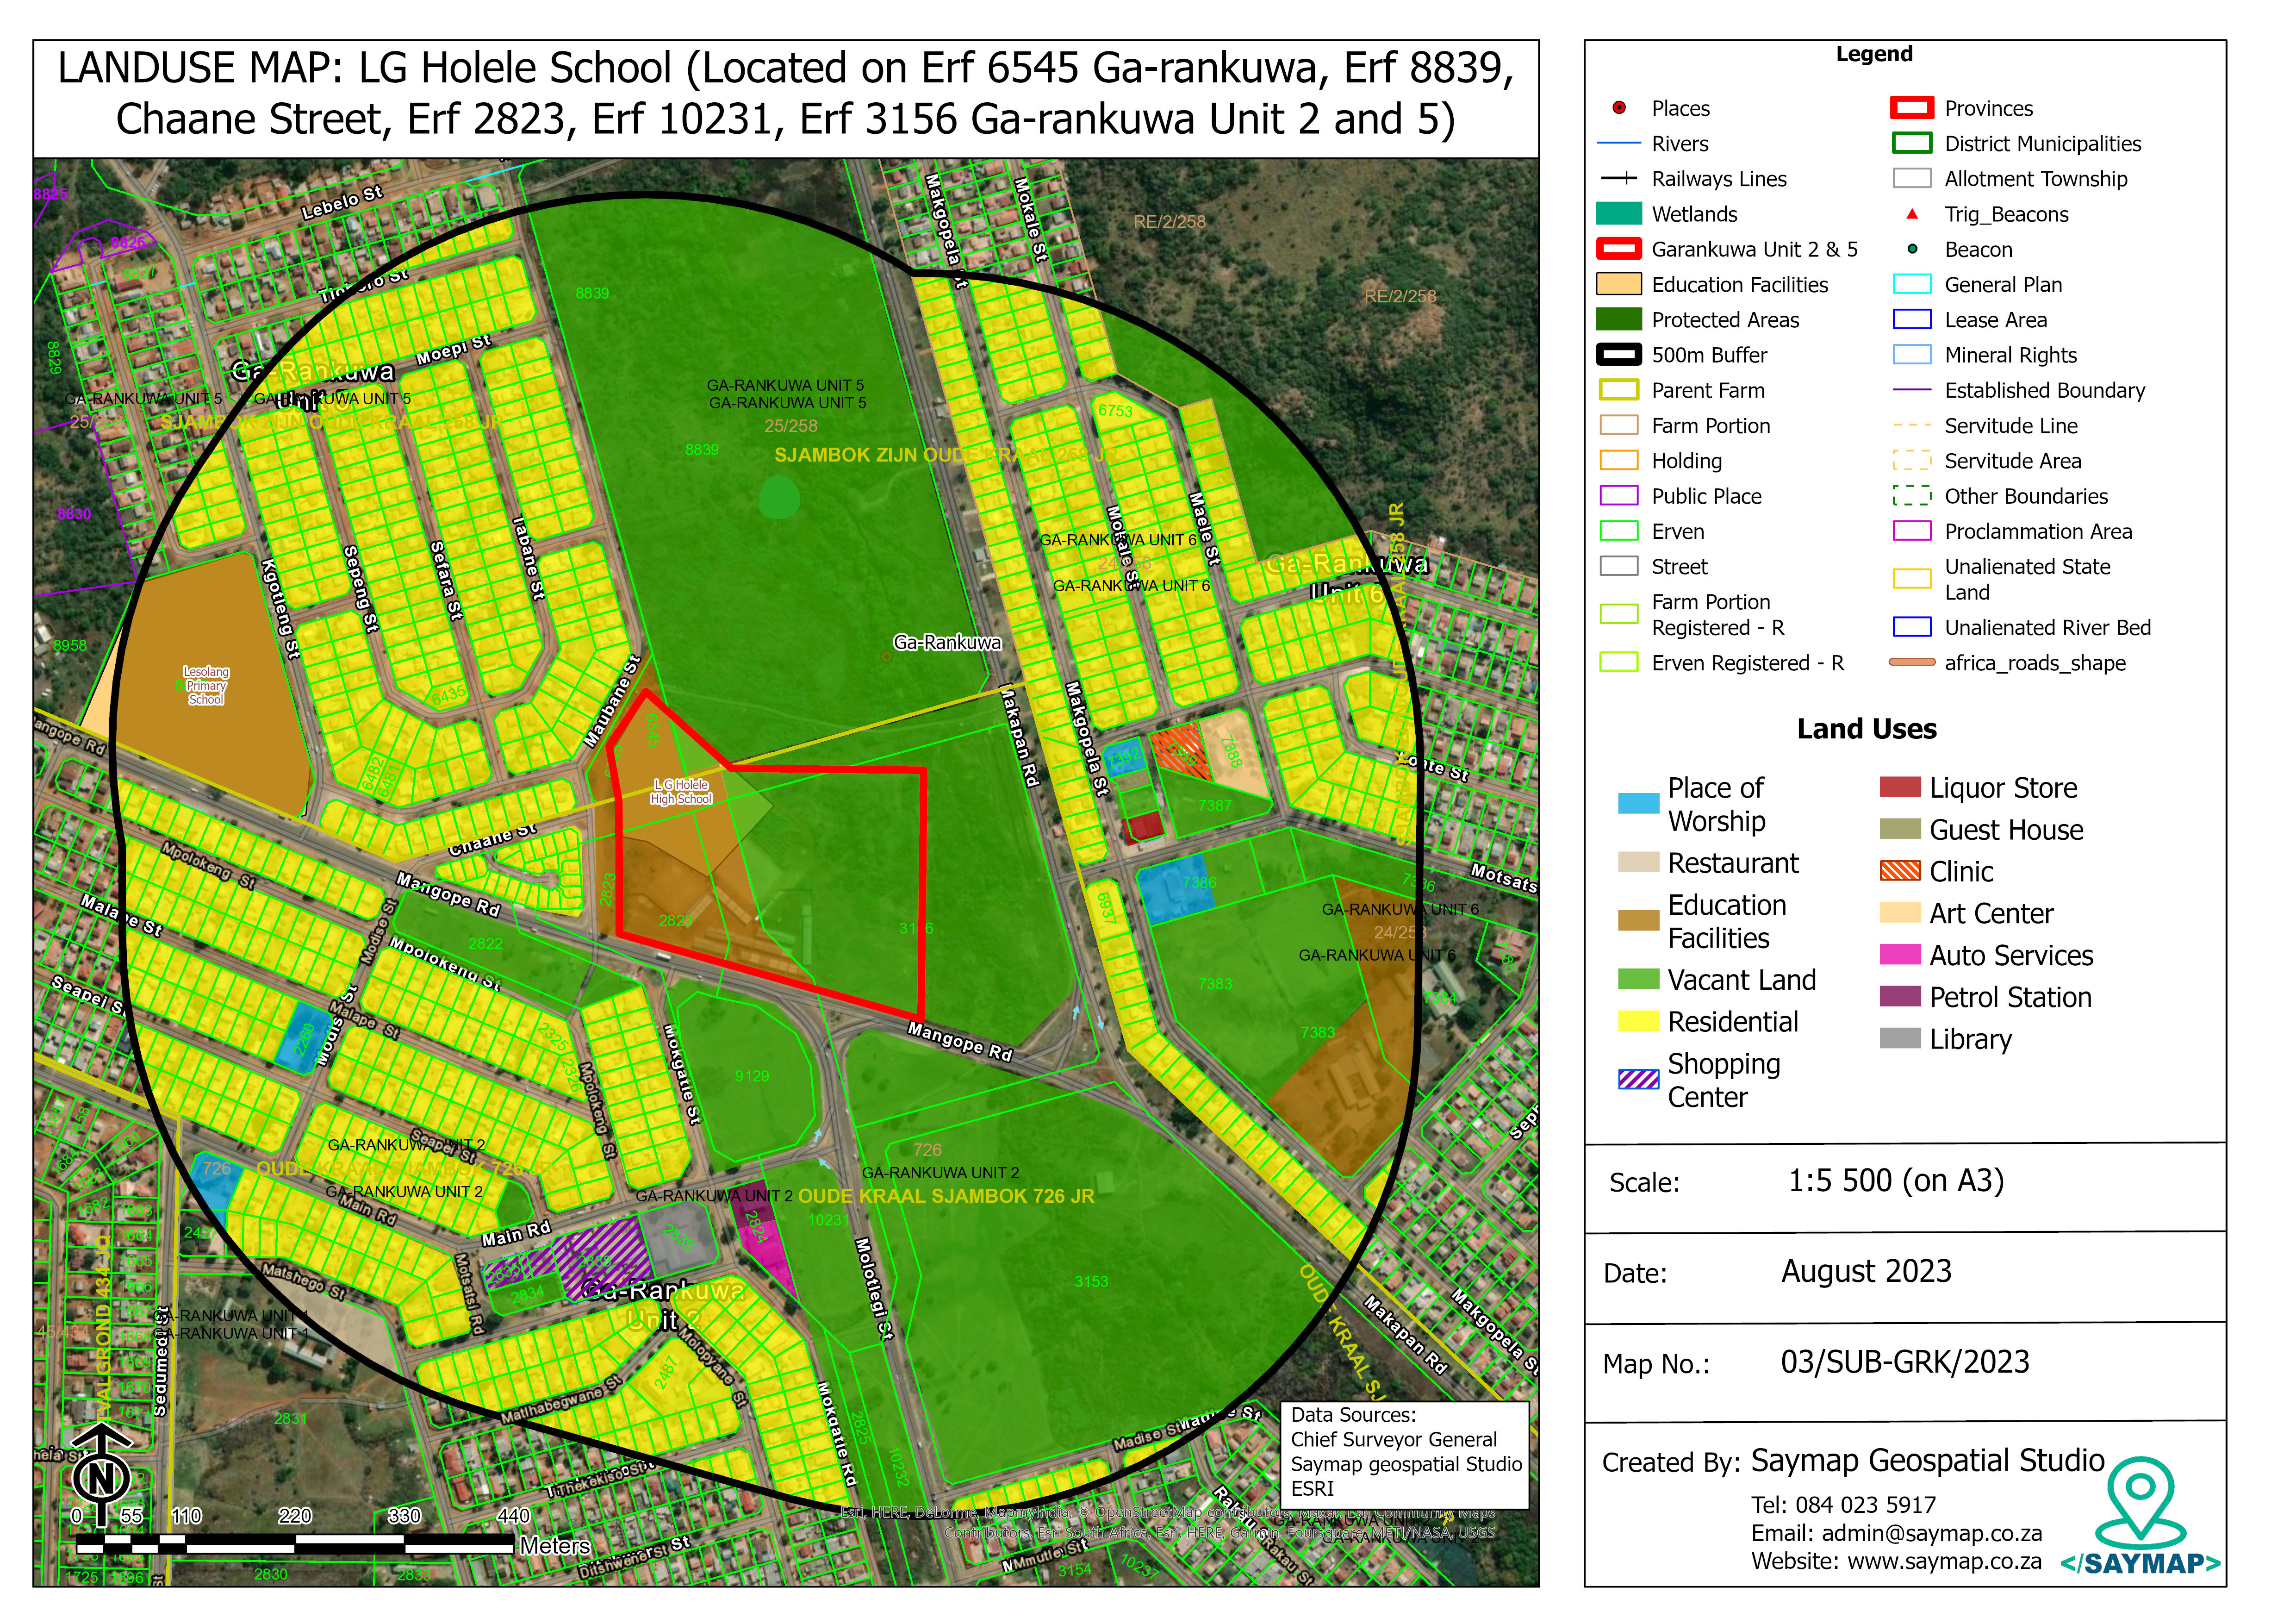
There are many industry uses for land use maps. For example, urban planners use land use maps in development projects to ensure that the proposed development meets the town planning requirements and is suitable for the current context. Land use maps can also show trends and patterns in a given geographic area by displaying uses such as residential areas, commercial or industrial zones, agricultural land and wetlands in distinct color pallets enabling map readers and decision makers to quickly identify areas of opportunity or weakness.
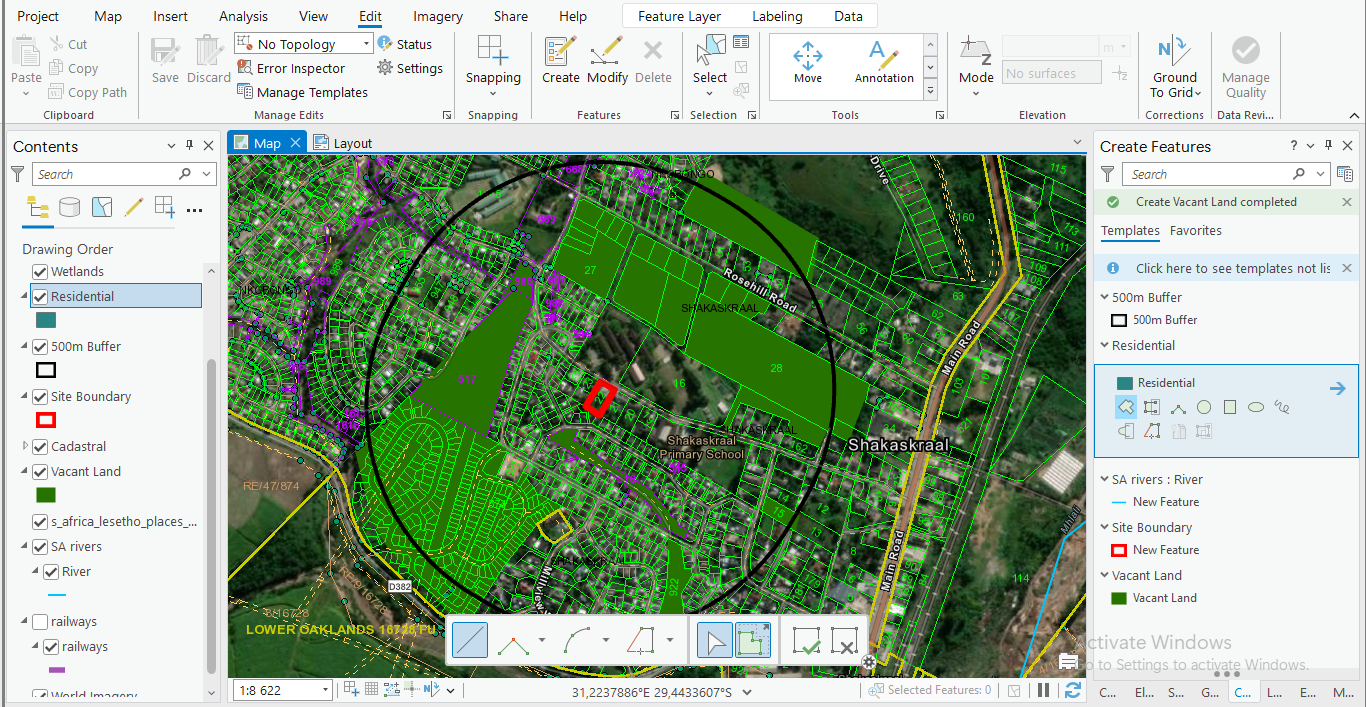
The video below is an example demonstration of a land use map being created in ArcGIS Pro. The aim of this project was to conduct a field survey to identify the various types of land uses within a 500 meter radius of the subject site. The collected data was to be presented in the form of a map.
To create a land use map in ArcGIS Pro, you will need the following:
- ArcGIS Pro software: You will need to have ArcGIS Pro installed on your computer. If you don't have it already, you can download a free trial version from the Esri website. Click on this link to Download ArcGIS Pro
- ArcGIS Online Account: You will need to have an ArcGIS online account to sign into arcgis pro. If you don't have it already, you can sign up for a free trial on the esri website.Click on this link to Create an Account
- Data: You will need data that contains information about land use. This data can come from a variety of sources,in this case, we conducted a land use survey and analyzed aerial imagery from a drone.
- A map document: You will need to create a new map document in ArcGIS Pro to work with your data. Simply open ArcGIS pro and create a new project.
- A symbology scheme: You will need to decide a symbology scheme to represent the different land use categories on the map. In this example, we are creating a land use map for a town planning project. In town planning, different categories have designated colors such as a residential area represented by yellow of an industrial area represented by purple or pink and public open spaces which are always represented in green.
- Cartographic Design Skills: You will need to design your map in a way that is visually appealing and easy to understand for the intended audience. This may involve adjusting the size and position of your map elements, and adding labels to certain map features.
Manual Digitizing Method
- Open ArcGIS Pro and start a new project.
- Once you have opened the project, add a basemap to the map view. To do this, navigate to the top and click the basemap icon. This will provide context and a reference for your Land Use map. Pan or navigate to the subject site by searching with coordinates or zoom in closer if you know the location of the site.
- You will need to create a new feature classes for the Land Use map. Right-click on the geodatabase in the Catalog pane and select New > Feature Class. In the Create Feature Class dialog box, you will need to give the feature class a name such as residential or open space, select the coordinate system and click the "run" button to create the new shapefile.
- Once you have created the new feature class, you can begin digitizing the land use categories onto the map. To do this, you will need to activate the editing mode by right-clicking on the feature class in the Contents pane and selecting Edit Features > Create.
- Once you click create, a tab window opens, navigate to the feature class you created and click on it, select the correct shape and begin digitizing by drawing on top of the aerial image or cadastral data. Use the Create Features tool to manually digitize the land use categories onto the map. As seen in the video demonstration, this tool allows you to create new features by selecting their vertices. You can use the appropriate tools and settings to ensure accuracy and consistency, such as snapping and the editing toolbar. This step is repeated until all the land use categories have been digitized
- Once you have digitized all of the land use categories, it is important to save your edits and stop editing. This will ensure that your changes are saved and that the feature class is updated with the new data.
- To symbolize the feature class, you can use the Symbology pane. Here, you can select the appropriate symbology for each land use category. You can also adjust the color variations, transparency, and other properties as desired.
- Finally, you can save your project and export the map as desired. You can choose from a variety of formats, such as PDF, PNG, or JPEG.
By following these detailed steps, you should be able to create a Land Use map in ArcGIS Pro using manual digitizing. This method also allows you to create customized and accurate map that meets your specific needs.